While the thought of updating your plugins may make you scared, we’re here to assure you that most WordPress plugin upgrades will not harm your site. That is, assuming you are carry them out correctly and safely. We’re here to assist you if you’re unsure how to do so. Let’s have a look at how to upgrade both WordPress and WordPress plugins safely.
Importance of updating your WordPress plugins
WordPress plugins should be updated for a variety of reasons, including the addition of a new feature or features . They may provide a new cloud storage option, improve the workflow and UI, or simply make quality-of-life improvements that make using the plugin more enjoyable in general.
However, the main reason developers update WordPress plugins is to address security concerns. The safety and security of your website should be your primary priority. The plugins on a WordPress site are one of its main loopholes. Plugins, as wonderful as they are, can conflict with one another and with your themes, and developers work constantly to patch vulnerabilities and update plugins so that your site isn’t vulnerable to attack.
What to do before updating your WordPress plugins
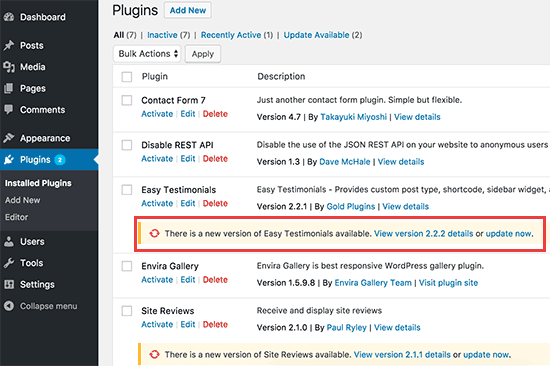
It’s critical to click the View version details link before updating the plugin to see what changes the plugin creator has made. This will keep you up to date on any modifications made in case something goes wrong.
We normally wait one week before updating the plugin unless the version specifications expressly state that it is a security update. During this time, all errors are usually discovered, reported, and corrected.
How to properly update WordPress plugins
Step 1: Prepare a Backup
It’s a good idea to make a full site backup before making any changes. This is only in case something unanticipated occurs. You don’t want to start over when all you wanted to do was make a minor change. When you upgrade WordPress and plugins, you risk making significant modifications to your site’s code. Occasionally, there may be incompatibilities or conflicts between the update and the site’s coding. When this happens, your website may experience a severe outage!
Step 2: Update WordPress
One of the most important things to keep in mind about plugin updates is that they are almost always built for the most recent version of WordPress. This means that before updating your plugins, you should make sure that WordPress itself is up to date.

The ‘WordPress Updates’ page will feature a part that indicates whether or not you have the most recent version of WordPress. Make sure you have the most recent version before proceeding to the next step!
Step 3: Check for updates
WordPress has an update system built in. It checks for updates automatically and sends you notifications when updates are available for your WordPress plugins, themes, and core software as below.
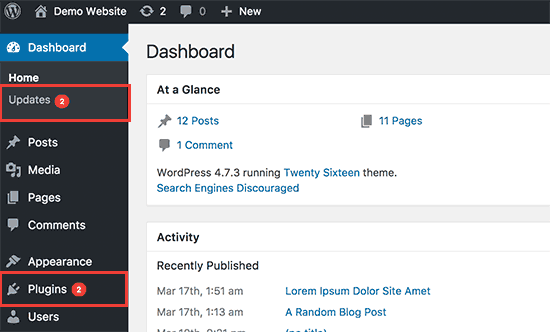
You can also manually check for updates by visiting Dashboard » Updates page.
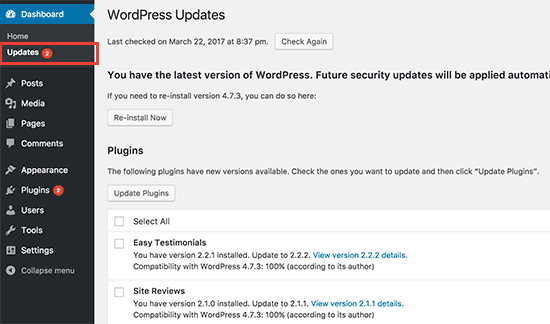
A notification will appear in your WordPress admin bar’s plugins menu when a new plugin update is released. You can then download these updates from the Plugins page.
Each plugin that has updates available for you to install will have a notification below it. To install each update, simply click the ‘Update Now’ link.
Step 4: Update Plugins
If you have multiple plugins on your website that need to be updated, you may wish to review and update them all at once.
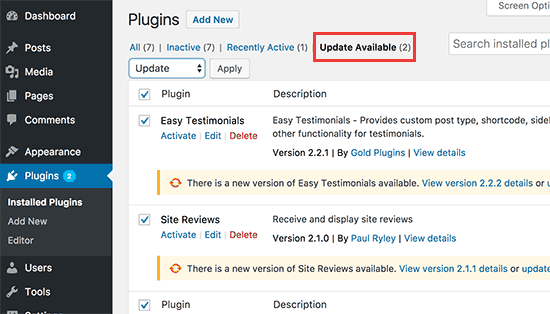
To do so, go to the Plugins page and click on the ‘Update Available’ button.
This will display a list of all plugins with available updates. Select them all and then choose ‘Update’ from the ‘Bulk Actions’ drop down menu.
How to undo a WordPress plugin update
Sometimes things may not go according to plan. A plugin update can sometimes have unintended consequences, such as some plugin functionality not working properly.
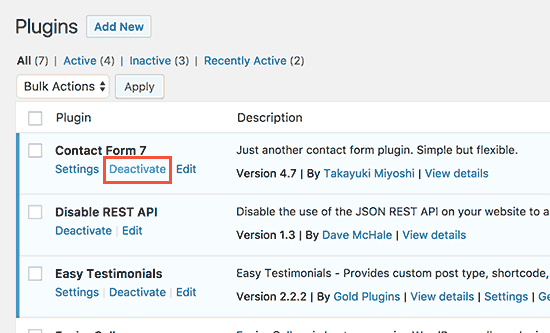
When this happens, you’ll first need to disable the plugin by simply clicking the ‘Deactivate’ option below the problematic plugin if you can access the Plugins page in the WordPress admin area.
Proceed to Install WP-Rollback plugin and you can learn more about step-by-step guide on installing a WordPress plugin.
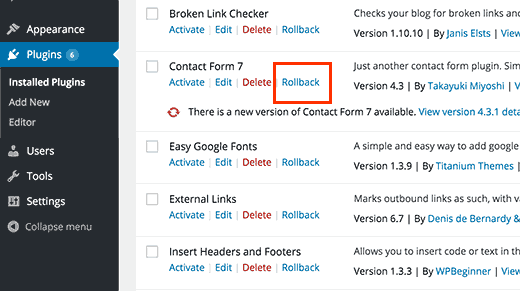
Return to the Plugins page after activation, and you’ll notice a rollback option below each plugin. You can rollback the plugin to any earlier version by clicking on it.
If you are unable to access the WordPress admin area, then follow this free guide on how to deactivate all plugins when not able to access WordPress admin area.


